Chain link fence installation is one of the most affordable and durable ways to secure a yard, contain pets, and mark property lines without breaking your budget. If you are weighing this option for your home, you probably want straight answers on price, the actual steps involved, and how long the work takes. This guide breaks down eight real cost factors, the installation process from start to finish, and a realistic timeline so you know exactly what to expect.
- Real pricing: You will see the eight factors that drive cost, with ranges from $10 to $40 per linear foot installed.
- Clear steps: You will learn the full installation process, from marking posts to stretching mesh.
- Honest timeline: You will get a realistic schedule, typically one to two days for a residential yard.
What Is Chain Link Fence Installation?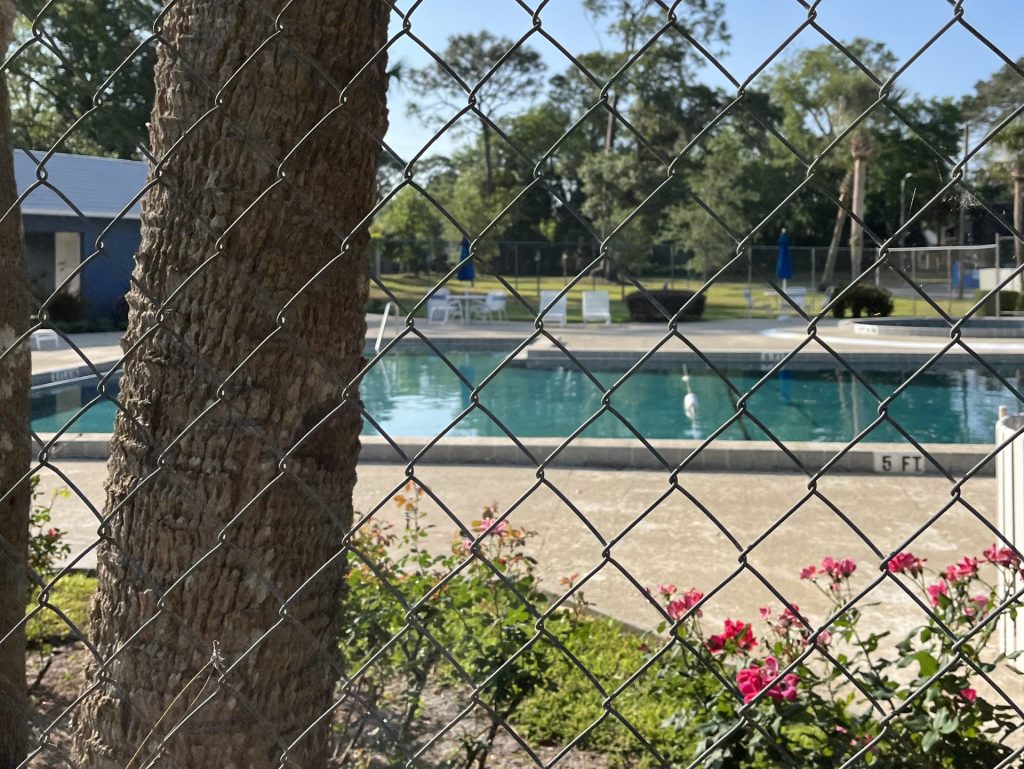
Chain link fence installation is the process of setting steel posts, attaching a framework, and stretching galvanized or vinyl-coated woven mesh to form a secure, see-through barrier. It is popular because the materials cost roughly half of wood or vinyl while delivering decades of low-maintenance service.
How Does a Chain Link Fence Work?
A chain link fence works by stretching a diamond-woven steel mesh tightly between anchored posts, creating a rigid barrier that resists pushing, climbing, and weather. The system relies on terminal posts at corners and ends, lighter line posts in between, a top rail for stability, and tension wire or bands that keep the fabric taut. Galvanized zinc coating protects the steel from rust, while an optional vinyl coating adds color and extra corrosion resistance. Together these parts form a fence that stays functional for 15 to 30 years with minimal upkeep.
- Terminal posts: Heavier corner and end posts anchor the whole system.
- Line posts: Lighter posts spaced along the run support the mesh.
- Top rail and tension wire: These keep the fabric tight and prevent sagging.
- Galvanized coating: Zinc shields the steel from rust for decades.
Why Choose Chain Link Over Other Fences?
Chain link is the most budget-friendly major fencing material, offering security and pet containment at roughly half the installed price of wood or vinyl. It goes up quickly, requires almost no maintenance beyond an occasional rinse, and lasts for decades thanks to its galvanized coating. The open weave also keeps sight lines clear, which is ideal for watching kids or pets in the yard, and it does not block airflow or light. For homeowners who prioritize function and value over privacy, chain link is tough to beat.
- Lowest cost: Materials run about half the price of wood or vinyl.
- Fast installation: Most residential jobs finish in one to two days.
- Low maintenance: No painting or staining, just occasional cleaning.
- Clear visibility: The open mesh keeps sight lines to the yard open.
8 Costs That Affect Chain Link Fence Installation
Understanding what drives the price helps you budget accurately and spot an inflated quote. Below are the eight biggest cost factors, each with real numbers so you can plan with confidence.
1. Linear Footage
Total linear footage is the single largest driver of chain link fence installation cost, since every added foot means more mesh, more posts, and more labor. Most homeowners pay between $10 and $40 per linear foot installed, so a 150-foot backyard typically runs from about $1,500 to $6,000 depending on height and materials. Measuring your fence line accurately before requesting quotes is essential, because even small measurement errors multiply across a long run. Corners, returns, and gate openings all factor into the final footage count.
- Cost range: Roughly $10 to $40 per linear foot installed.
- Typical yard: A 150-foot run often lands between $1,500 and $6,000.
- Measure first: Accurate footage prevents surprise overages.
- Count corners: Each corner adds a post and hardware.
2. Fence Height
Fence height directly affects cost because taller fences require more mesh, heavier framework, and additional labor to install. A 4-foot fence, common for front yards and pet containment, sits at the lower end of the price range, while 6-foot fences increase material costs by roughly 30 to 40 percent. At 7 and 8 feet, prices jump sharply because the heavier framework overlaps with commercial-grade specifications. Choosing the right height for your actual need, rather than defaulting to the tallest option, is an easy way to control your budget.
- 4-foot fences: The most economical, ideal for pets and boundaries.
- 6-foot fences: Roughly 30 to 40 percent more than 4-foot.
- 7 to 8 feet: Prices rise sharply toward commercial spec.
- Match the need: Pick the height that fits your purpose.
3. Wire Gauge
Wire gauge, which measures the thickness of the steel, affects both durability and price, with lower gauge numbers meaning thicker, stronger, and pricier wire. Standard residential fencing uses 11.5-gauge or 12-gauge mesh, which balances cost and durability for typical backyard use. Heavier 9-gauge wire, common for security and commercial applications, costs roughly 15 to 30 percent more but resists cutting and heavy impact far better. Choosing the right gauge means weighing your security needs against your budget for the long haul.
- 11.5 to 12-gauge: Standard residential, good value and durability.
- 9-gauge: Heavier and stronger, costs 15 to 30 percent more.
- Lighter gauges: Cheaper but better suited to temporary use.
- Security note: Thicker wire resists cutting and impact.
4. Coating Type
The coating you choose affects both appearance and price, with basic galvanized being cheapest and vinyl-coated adding cost for looks and extra corrosion protection. Galvanized steel, coated in zinc, is the standard and most affordable option that resists rust for decades. Vinyl-coated mesh, usually in black, green, or brown, adds a cleaner appearance and an extra barrier against moisture, making it popular for residential yards and coastal areas. Expect vinyl coating to add several dollars per linear foot over bare galvanized.
- Galvanized: The standard, lowest-cost option with zinc protection.
- Vinyl-coated: Adds color and extra corrosion resistance for more money.
- Coastal benefit: Vinyl coating helps in humid, salty climates.
- Curb appeal: Black vinyl blends into landscaping.
5. Gates
Gates add a meaningful but manageable amount to your total, since each one requires its own posts, hardware, and labor to hang and align. A standard residential walk gate typically runs from about $100 to $450, while larger drive gates or automated rolling gates cost significantly more. Placement and width matter too, because wider openings need heavier framework to stay square and swing smoothly. Planning gate locations before installation helps the crew set posts correctly the first time.
- Walk gates: Roughly $100 to $450 for a standard swing gate.
- Drive gates: Larger and automated options cost much more.
- Hardware: Hinges and latches add to each gate’s price.
- Plan ahead: Confirm gate spots before posts are set.
6. Terrain and Site Conditions
Difficult terrain raises chain link fence installation costs because sloped, rocky, or root-filled ground takes longer to dig and set posts correctly. Installing on a slope can add 25 to 50 percent to labor because it requires extra posts and stepped or racked configurations to follow the grade. Hard or rocky soil slows post-hole digging and may require special equipment or concrete footings for stability. A walk-through of your property helps the installer flag these challenges before finalizing a quote.
- Sloped ground: Can add 25 to 50 percent to labor costs.
- Rocky soil: Slows digging and may need special tools.
- Concrete footings: Recommended for stability in tough soil.
- Site walk: An on-site look catches hidden costs early.
7. Old Fence Removal and Site Prep
Removing an existing fence and preparing the site adds to the total, typically running $3 to $8 per linear foot depending on the old material and disposal needs. Clearing brush, leveling uneven ground, and hauling away debris all take time and labor before new posts can go in. If your yard has old concrete footings from a previous fence, breaking them out adds further cost. Handling some of this prep yourself, where safe, is one way to trim the bill.
- Removal cost: Roughly $3 to $8 per linear foot for old fencing.
- Debris disposal: Hauling and dump fees add to the total.
- Ground prep: Clearing and leveling take extra labor.
- DIY savings: Doing safe prep yourself can lower costs.
8. Permits and Labor Rates
Permits and regional labor rates round out the cost picture, with permits often running $40 to $200 and labor accounting for roughly half the total. Most municipalities require a permit for a new fence, and fees vary by height, location, and property type. Labor rates swing widely by region, with urban and coastal markets charging noticeably more than rural areas for the same fence. A detailed, itemized quote helps you see exactly how permits and labor factor into your total.
- Permit fees: Commonly $40 to $200 depending on local rules.
- Labor share: Roughly 50 percent of the total install cost.
- Regional swings: Urban markets cost more than rural ones.
- Itemized quote: Shows how each cost is calculated.
Step-by-Step Chain Link Fence Installation Process
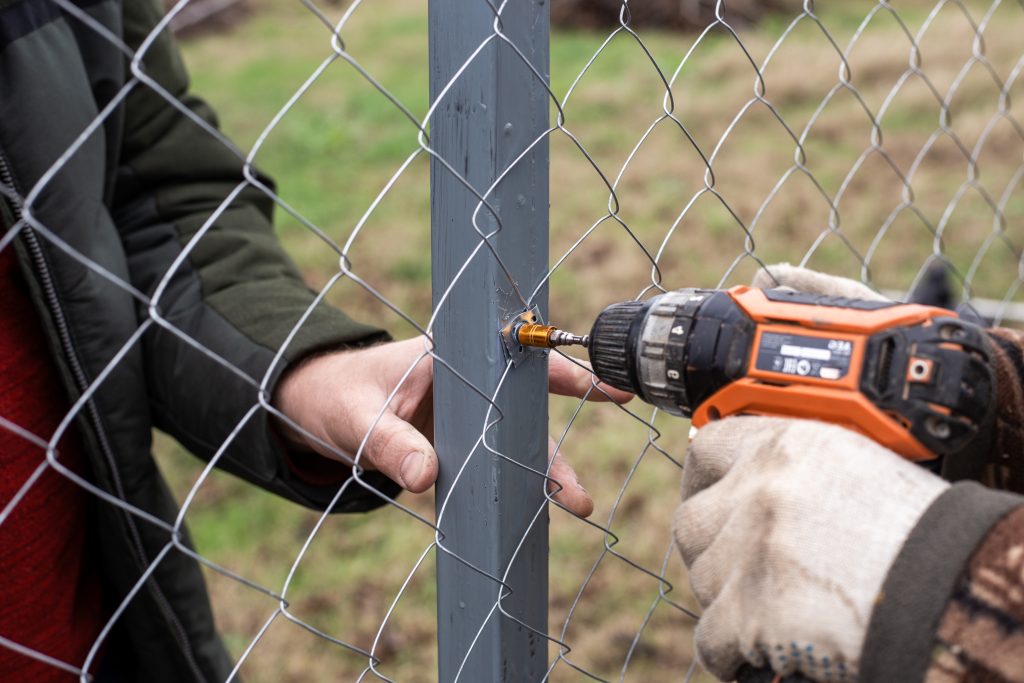
Knowing the steps helps you understand what you are paying for and how the crew turns raw materials into a finished fence. Here is how a professional installation typically unfolds.
How Do You Plan and Mark the Fence Line?
Planning begins by measuring the fence line, marking post locations, and calling to locate underground utilities before any digging starts. The crew stakes out corners and end points, runs a string line to keep everything straight, and spaces line-post marks evenly along the run. Calling 811 to mark buried utilities is a critical safety step that prevents dangerous and costly strikes. This groundwork ensures the finished fence is straight, properly spaced, and free of underground surprises.
- Measure and mark: Stake corners, ends, and evenly spaced line posts.
- Call 811: Locate underground utilities before digging.
- Run a string line: Keeps the fence straight and true.
- Confirm the layout: Verify spacing before breaking ground.
How Are Posts Set?
Posts are set by digging holes, placing terminal and line posts, and anchoring them in concrete footings that drain properly to prevent shifting. Terminal posts at corners and ends go in first and are heavier, since they bear the tension of the stretched mesh. Line posts follow at even spacing, and all posts are checked for plumb and correct height before the concrete cures. Allowing the footings to set fully before hanging fabric is essential, because rushing this step leads to leaning posts later.
- Terminal posts first: Heavier corner and end posts anchor the run.
- Line posts next: Evenly spaced and set to consistent height.
- Concrete footings: Anchor posts and must drain to avoid heaving.
- Let it cure: Footings should set before the fabric goes on.
How Is the Mesh Hung and Stretched?
The mesh is hung by attaching the top rail, unrolling the fabric, and stretching it tight with a come-along tool before securing it to posts and tension wire. Getting the tension right is the mark of a professional job, since evenly stretched fabric resists sagging and looks clean for years. The fabric is tied to line posts and the top rail with wire ties, and tension bands lock it to terminal posts. Gates are hung last, then adjusted so they swing and latch smoothly.
- Attach the framework: Install the top rail and tension wire first.
- Stretch the fabric: A come-along pulls the mesh taut and even.
- Secure with ties: Wire ties and tension bands lock it in place.
- Hang gates last: Adjust for smooth swinging and latching.
How Long Does Chain Link Fence Installation Take?
Timeline is one of the most common questions, and the answer depends on yard size, terrain, and whether old fencing must come out first. The two sentences below give you the realistic range most homeowners can expect.
What Is the Typical Installation Timeline?
Most residential chain link fence installations take one to two days once materials are on site and permits are approved. A professional crew installs roughly 80 to 150 feet of fence per day, so larger yards, multiple gates, or difficult terrain can extend the schedule. Concrete footings also need curing time, which is why some jobs span two days even when the labor itself moves quickly. A DIY installation, by contrast, often stretches to three to five days for a first-timer.
- Professional job: Typically one to two days for a residential yard.
- Daily pace: Crews install about 80 to 150 feet per day.
- Curing time: Concrete footings can add to the schedule.
- DIY timeline: Often three to five days for a beginner.
What Can Delay Your Installation?
Delays usually come from permit approval, weather, difficult terrain, or the need to remove an old fence before work begins. Permits can take days or weeks to approve depending on your municipality, so applying early keeps things on track. Rain and frozen ground slow digging and concrete curing, while sloped or rocky yards add time to post setting. Removing and disposing of an existing fence also adds a half-day or more to the front of the schedule.
- Permit timing: Approval can take days to weeks.
- Weather: Rain and frozen ground slow digging and curing.
- Tough terrain: Slopes and rock extend post setting.
- Old fence removal: Adds time before new work starts.
Frequently Asked Questions
How much does chain link fence installation cost?
Chain link fence installation typically costs $10 to $40 per linear foot installed, or about $1,500 to $6,000 for a 150-foot yard. The final price depends on height, wire gauge, coating, gates, and terrain. Request an on-site measurement for an accurate, itemized estimate.
How long does it take to install a chain link fence?
A professional crew usually installs a residential chain link fence in one to two days once materials and permits are ready. Crews install roughly 80 to 150 feet per day, so larger yards or difficult terrain take longer. Concrete footing cure time can also stretch the job across two days.
Can I install a chain link fence myself?
Yes, chain link is one of the more DIY-friendly fences, but stretching the mesh evenly and setting posts plumb takes skill and the right tools. A first-time DIY job often takes three to five days and risks sagging or leaning if tension and post depth are off. Professional installation ensures a clean, tight, long-lasting result and keeps warranties intact.
How long does a chain link fence last?
A galvanized chain link fence typically lasts 15 to 25 years, while vinyl-coated versions often reach 20 to 30 years or more. Lifespan depends on coating quality, wire gauge, climate, and maintenance. Coastal and humid areas benefit most from vinyl-coated mesh.
Do I need a permit for a chain link fence?
Most municipalities require a permit for a new fence, with fees commonly running $40 to $200. Requirements vary by fence height, location, and whether your property is residential or commercial. Always check local codes and any homeowners association rules before installation.
Do chain link fence posts need concrete?
Concrete footings are strongly recommended because they anchor posts securely and prevent leaning, especially for taller fences or windy areas. Some soils allow driven posts, but concrete provides far better long-term stability. Footings must also drain well so trapped moisture does not heave the posts.
Why Fence Direct Is the Right Choice for Chain Link Fence Installation
When you are planning a chain link fence installation, you want a team that sets posts straight, stretches the mesh tight, and gets the job done on schedule, and that is exactly what Fence Direct delivers. Our crews handle everything from utility marking and permitting to deep-set concrete footings and precisely tensioned fabric, so your fence stays secure and good-looking for decades. Every new fence installation is backed by a two-year workmanship warranty on top of the manufacturer coverage, giving you real confidence in the result. We measure carefully, explain your cost and material options in plain language, and handle the details that protect both your warranty and your property.
If you are ready to move forward with chain link fence installation, reach out to Fence Direct for expert guidance and a free estimate. We return every call within 24 business hours, so getting real numbers for your fence is quick and pressure-free. Contact us today and let our team install a durable, budget-friendly chain link fence that fits your yard, your timeline, and your peace of mind.